Orthodontic rubber bands, also called elastics, play a crucial role in achieving a functional, healthy bite during braces treatment. While brackets and wires move your teeth into alignment, rubber bands help correct jaw and bite issues by applying additional targeted pressure. Whether you’re just beginning orthodontic treatment or are in the middle of wearing braces, understanding rubber bands is key to achieving a successful outcome.
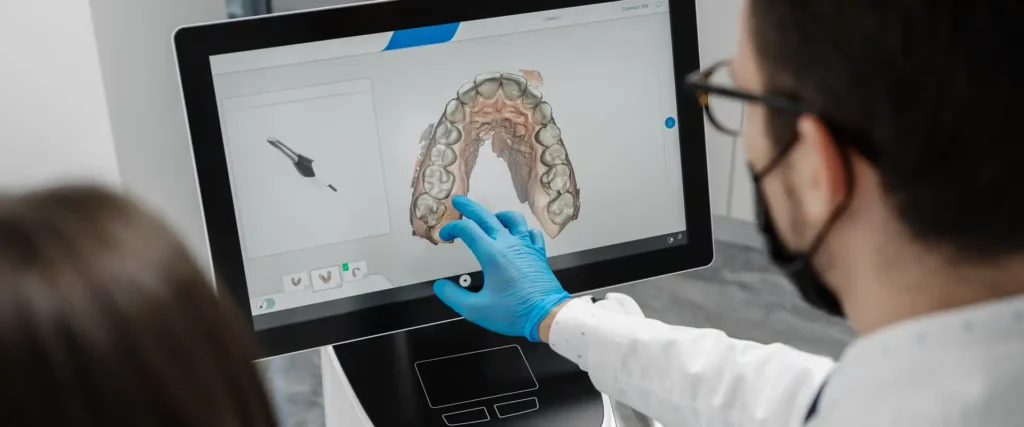
Rubber bands are one of the most common types of appliances used with braces. When you start treatment with Greater Northwest Orthodontics in Issaquah, we’ll show you how to wear your rubber bands and tell you everything you need to know about your treatment.
In the meantime, check out this guide for rubber bands with different types of braces!
What Are Orthodontic Rubber Bands?
Orthodontic rubber bands are small elastic loops that connect to brackets on the upper and lower teeth. They are removable and used in addition to your braces to guide the position of your jaw. Rubber bands come in various sizes, strengths, and configurations—each designed for specific orthodontic purposes. They can also be used with Invisalign aligners.
These elastics help move your bite into proper alignment and are often used in the later stages of treatment to fine-tune results. Depending on your individual needs, your orthodontist will show you how and where to attach them.
Why Are Rubber Bands Used in Braces Treatment?
Rubber bands are used to correct a wide range of bite problems, including:
- Overbite – Where the upper teeth protrude too far over the lower teeth
- Underbite – Where the lower teeth extend beyond the upper teeth
- Crossbite – When the upper and lower jaws don’t align side-to-side
- Open bite – When front teeth don’t touch when the back teeth are together
- Midline misalignment – When the center of the upper and lower front teeth does not line up
By applying constant pressure, rubber bands help adjust the jaw and bite to ensure long-term dental health and a stable, functional smile.
Different Types of Rubber Bands for Braces
There are several types of orthodontic elastics, each suited for specific corrections:
- Class I elastics – Used within the same arch to close gaps
- Class II elastics – Stretch from upper front teeth to lower back teeth to correct overbites
- Class III elastics – Connect lower front teeth to upper back teeth to fix underbites
- Triangle elastics – Help close open bites
- Cross elastics – Correct crossbite problems
The configuration, strength, and duration of rubber band wear will vary depending on your treatment plan.
But you don’t have to worry about the different types of rubber bands. That’s for Dr. Pawar to determine. All you have to know is how to wear them to achieve beautiful results.
How to Wear Rubber Bands on Braces
On your braces brackets, you’ll notice rubber band hooks on the top arch and the bottom arch. Your rubber band hooks will be located on a specific tooth or area, depending on your condition, but they’re generally located on the canine teeth (the pointy teeth in the corner of the mouth) and the molars (the big teeth toward the back of the mouth).
In some cases, rubber band hooks will also be prescribed on the bicuspid teeth (the premolars between the canines and molars).
Here’s how you’ll attach your elastics to your brackets:
- Wash your hands! This step is super important. Never touch your mouth with unwashed hands.
- Use one finger to place the rubber band over the hook on the top arch.
- Using two fingers, pull the rubber band across your teeth to the bottom hook.
- Hook the rubber band in place.
See? Super simple. We’ll show you how to do this in person when you start wearing your rubber bands too.
It is important to note that you should:
- Follow instructions exactly – Wear your rubber brands as prescribed by your orthodontist—typically 24/7 except when eating or brushing.
- Replace them often – Elastics lose strength over time; change them at least 3–4 times daily.
- Attach them correctly – Make sure they’re placed on the correct brackets and in the right configuration.
- Be consistent – Skipping even a few hours can delay treatment.
You can use a special little tool called a rubber band tool for braces to make it even easier. This tool is a small plastic hook that you can use to pull the rubber band down or up to the other bracket hook. If this “tool” is not available, tweezers should work just fine.
Dos and Don’ts of Wearing Rubber Bands
When wearing rubber bands make sure you:
- Wear them as instructed
- Keep extras on hand
- Replace after every meal
- Use clean hands when applying
You want to avoid the following:
- Doubling up unless instructed
- Using old or damaged elastics
- Removing rubber bands unnecessarily
- Waiting to replace lost bands—contact us for more
Tips for Managing Discomfort
It’s normal to feel some soreness when you first start wearing elastics. Here are a few tips:
- Take over-the-counter pain relievers (if approved by your doctor)
- Stick to soft foods in the first few days
- Use orthodontic wax if rubber bands irritate your cheeks or gums
- Keep up with good oral hygiene practices to avoid irritation from plaque buildup
How Do Rubber Bands Work?
When you understand your orthodontic condition and the position of your bite, your rubber bands start to make a lot more sense.
If you have an overbite, meaning your upper jaw extends too far over your lower jaw, you will want to shift the upper jaw backward and the lower jaw forward to align them. In this case, your rubber bands will attach to a bracket on the bottom teeth, toward the back of your mouth, and a bracket on the top teeth, toward your canines. The rubber band tension will start to pull the upper jaw backward and the lower jaw forward, effectively treating an overbite.
If you have an underbite, then vice versa. You want your lower jaw to shift backward and your upper jaw to move forward, so your rubber bands will be attached the opposite way.
Your bands will be hooked on a top arch bracket and a lower arch bracket to create tension that accelerates the braces straightening process and aligns the jaw bones.
When Do You Start Wearing Rubber Bands for Braces?
It depends on your personalized treatment plan. Some patients may start wearing them after only a few appointments, while others may start wearing rubber bands toward the end of their braces treatment process. It all depends!
In most cases, you’ll be advised to wear your rubber bands throughout the day and night. You can remove them to eat, brush your teeth, and replace them with new rubber bands 1-3 times daily.
When you visit us for your complimentary consultation, we’ll explain everything you need to know! After Dr. Tripti Pawar examines your smile, we’ll discuss your personalized treatment plan in full detail.
Educating our patients is extremely important to us! That’s how the greatest results are created.
What Happens If You Don’t Wear Your Rubber Bands?
Skipping rubber bands, even for a day, can slow your progress significantly. Since the pressure needs to be continuous to move your jaw and teeth, inconsistent wear causes the teeth to relapse or stall in movement. This can extend your treatment time and affect your results. Always follow your orthodontist’s instructions to stay on track.
FAQs About Braces Rubber Bands
Here are some frequently asked questions about rubber bands for braces:
How Long Will I Need to Wear Rubber Bands?
This varies by case. Some patients wear them for a few months, while others need them throughout most of their treatment.
Can I Eat with Rubber Bands In?
It’s best to remove them when eating and put in fresh bands after meals.
Do Rubber Bands Hurt?
Some discomfort is normal, especially early on, but it usually fades within a few days.
What If I Run Our of Elastics?
Call our office or contact us online to get more right away.
Still Have Questions About Rubber Bands and Braces?
Whether you’re wearing traditional braces, ceramic braces, or even exploring Invisalign treatment, rubber bands may be part of your personalized treatment plan. Our team at GNW Orthodontics is here to guide you through every step of your orthodontic journey, including how to wear your rubber bands correctly for optimal results.
If you still have questions, please don’t hesitate to reach out to us. Our team is here for you, and we want to make your experience a positive one.
If you’re looking for an Issaquah orthodontist, we’d love to meet you and help you find your perfect smile! Take the first step today by requesting a complimentary consultation with Dr. Tripti Pawar and our experienced team.